
 Most quality ukuleles are primarily made on either the US mainland or Hawaii and I have been thinking for some time about having one made by Californian luthier John Kinnard
As I think it will be a fun project this blog is going to try to follow the build as we go along.
I asked JK, who has specialised unmaking Gypsy Jazz guitars and small bodied guitars, to work with me to bring the idea to life. I wanted a Tenor sized uke, as I already having a nice 1950’s Martin Soprano. It’s going to have a low G or 4th string which will make the sound more guitar like and a great travel companion… while I do travel with my parlour guitars they are still relatively large and this will be great for trips. I’m scheduling a trip to the US later this year to see friends and would ideally like to pick this up when I get there. In particular I’d like to show it to Ron Larson who has just started building really cool Lartone Cigar Box guitars to see if I can tempt him into making ukuleles.
February 2013: Hawaiian Koa is still often the preferred choice for quality ukulele tonewood – it’s stiffness gives that characteristic bright ukulele sound and the colour and figuring can be exquisite. It seemed to me that Walnut might work both tonally and in terms of look as well – and not used that widely in fretted instrument construction.
John managed to come up with a few interesting sets – one of the advantages of building small is that sets that would never be wide enough to bookmatch for even a parlour guitar are wide enough for a Tenor Uke.
 Having looked at, and then rejected, some beautiful sets with sapwood figuring we found a set that seemed to have the colour and the figuring that competed with the best that Koa could offer, but could only be Walnut…
This is the set we chose for the front, the set for the back was from the same batch so we have an instrument that has a matched front and back.
March 2013: We spent quite a bit of time deciding on how fancy we wanted the uke to be and how traditional in appointments. I thought that the body should be fairly plain with some simple purfling and binding.
For the binding we think corresponding walnut with a simple WBW (white/black/white) purfling line to define the body shape and a similar simple pattern for the rosette. As with many of my instruments we plan for the neck to be plain with no marker inlays together with a plain peg headstock using simple ‘Peg Hed’ tuners.
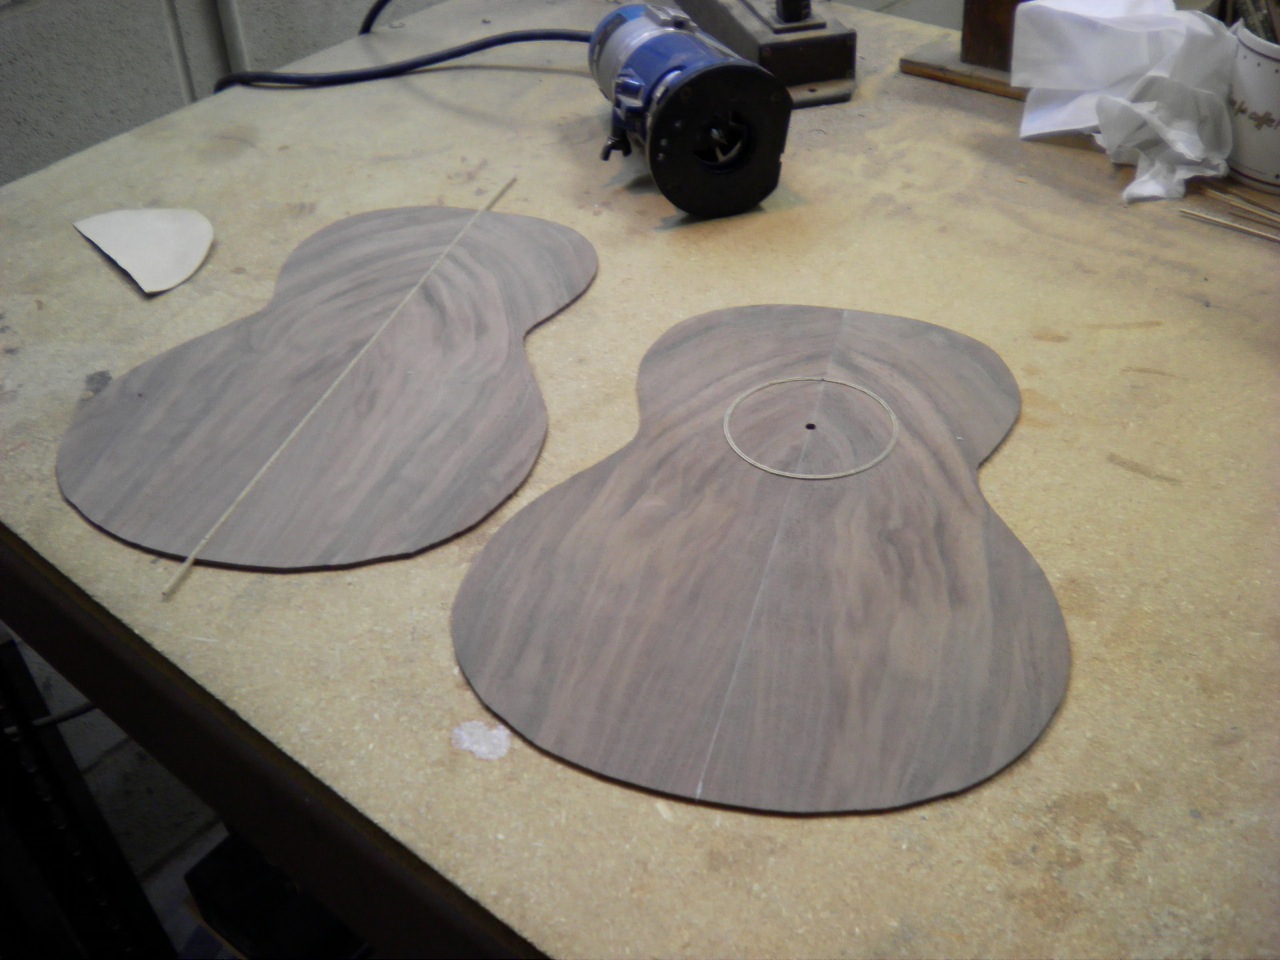
Late March 2013: We’ve finally been able to start the build! The top and back have been cut out and look really nice… and that’s before any finishing which will really pull out the colour. And I love the fact that the top and back are almost identical. This probably won’t be so apparent when the front has both the sound hole cut out and the neck running down to the sound hole but I’ll know! The uke is having to fit around other builds in the shop so that’s going to be about it for a week or two.
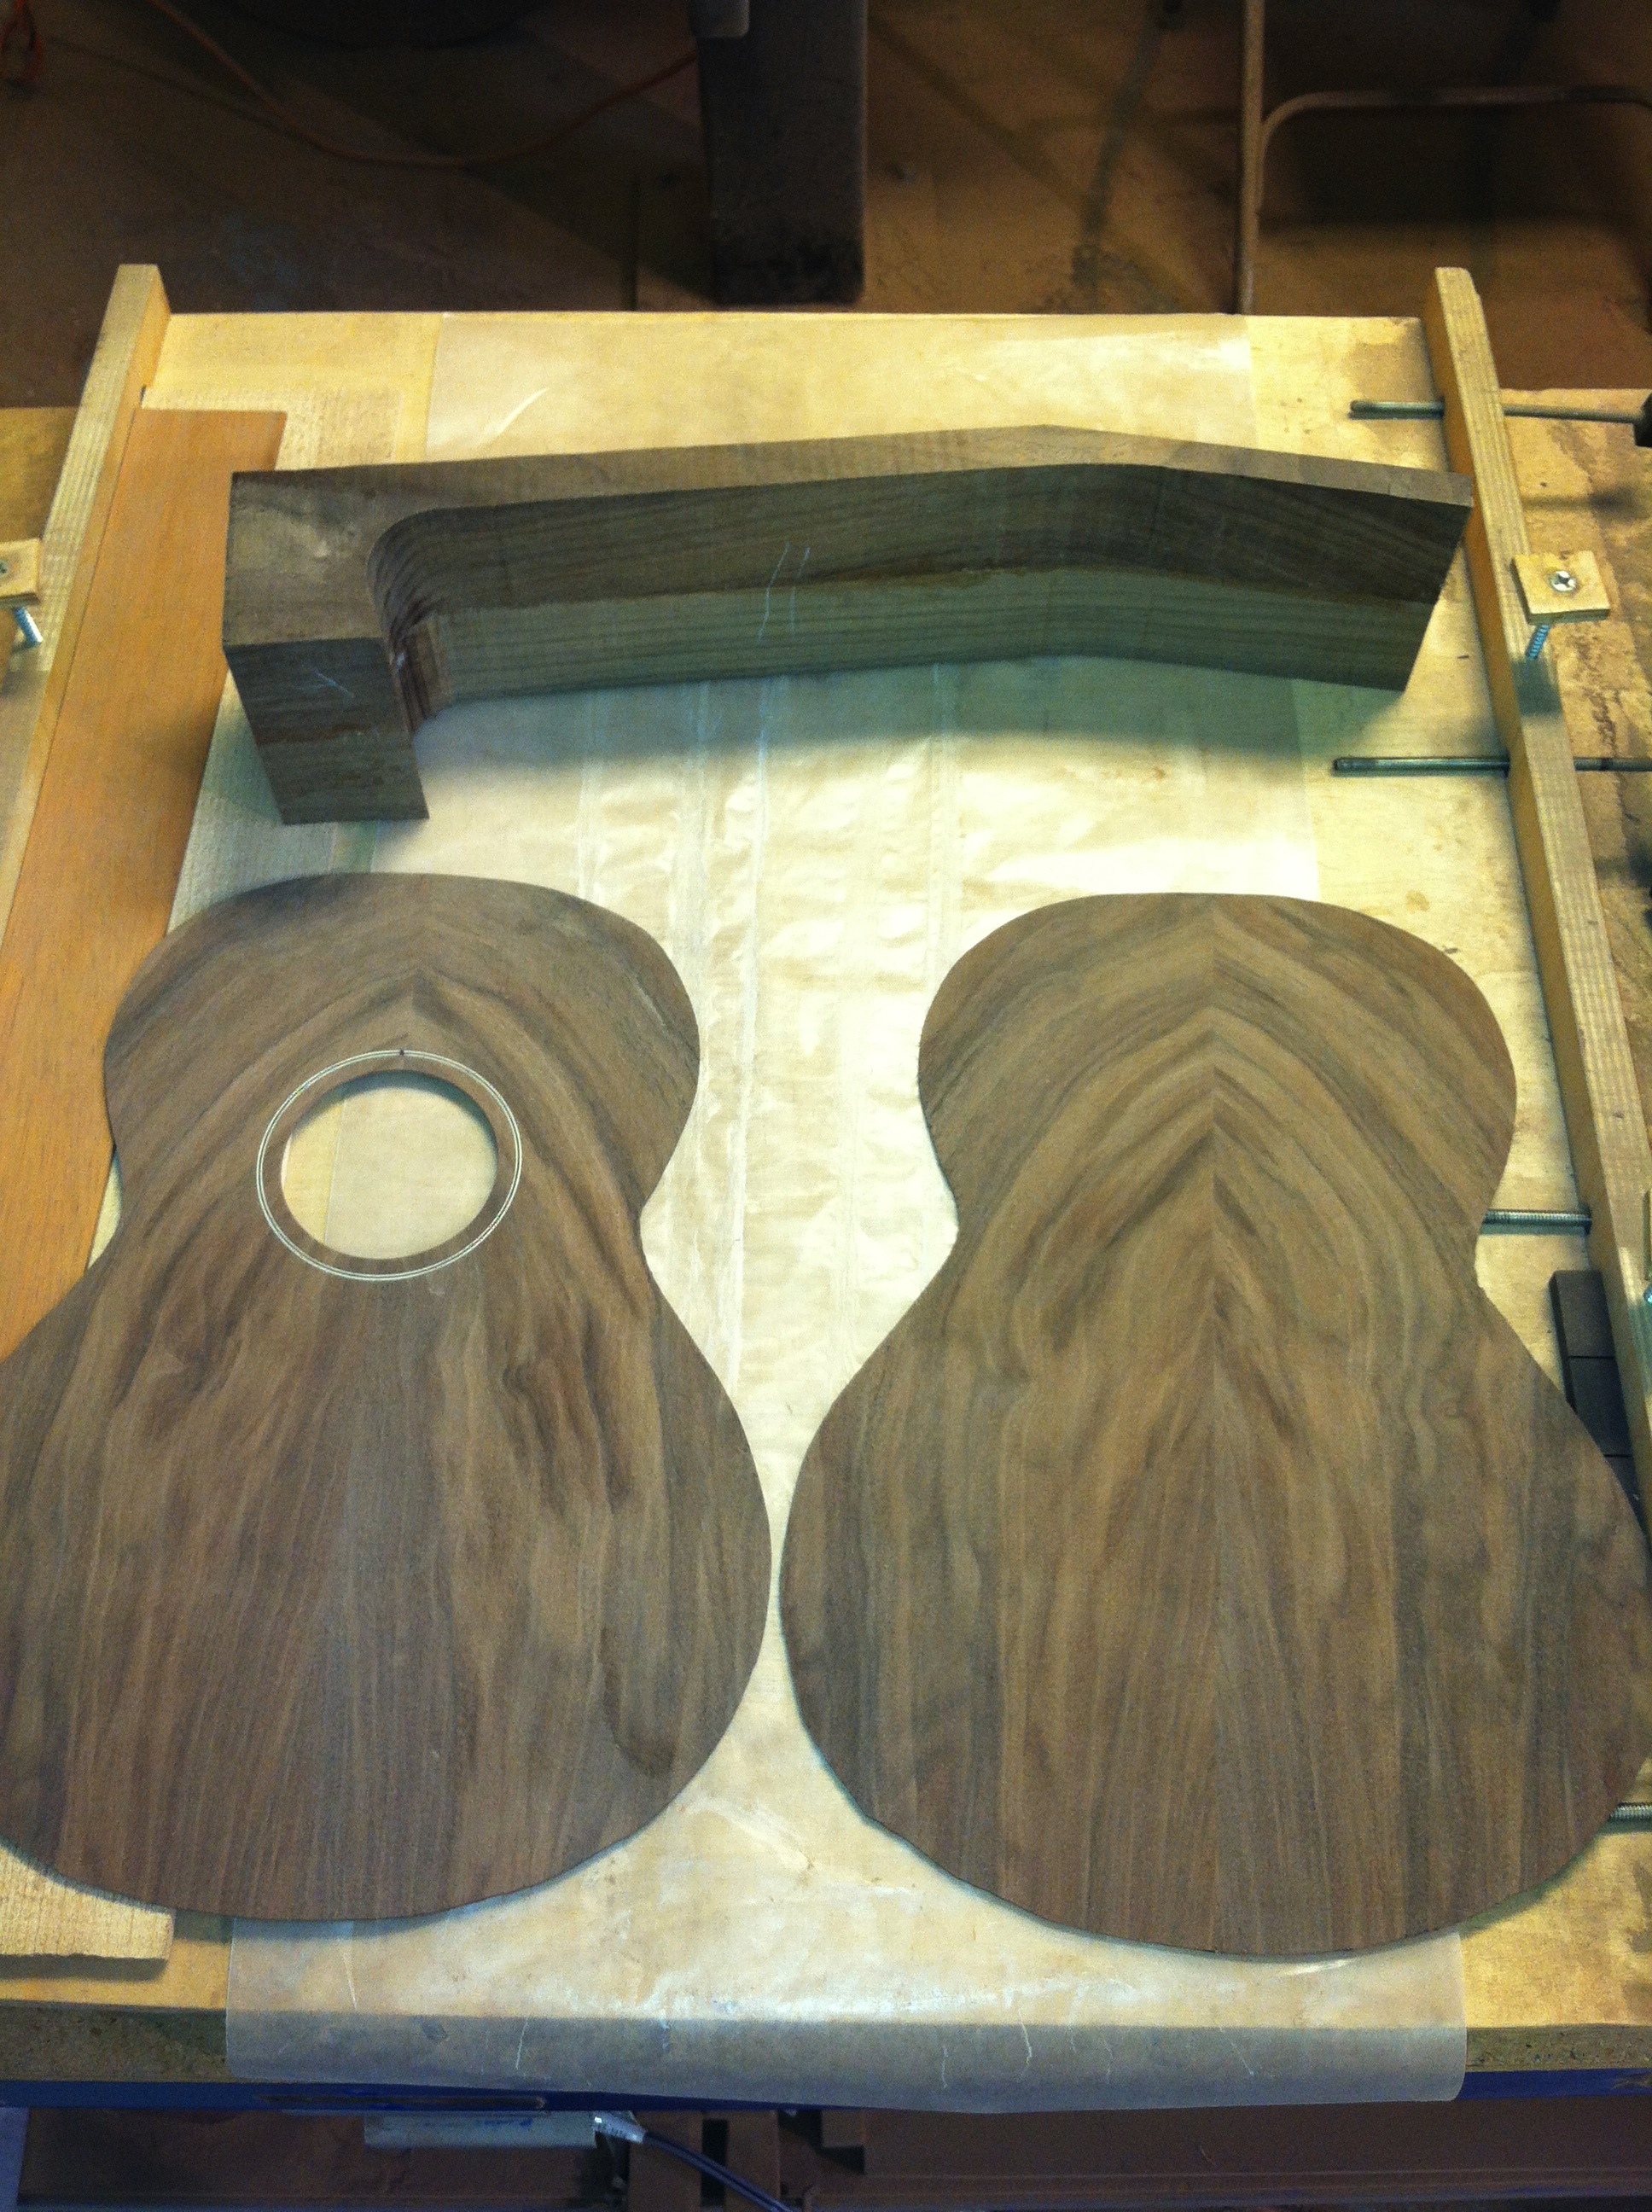
April 2013: We’ve been discussing the number of frets to the body and have gone for 13, similar to the SCGC H-13. It has a slight effect on the tone and importantly means that the bridge won’t have to be too far down the body. Having made that decision there was a slight hiatus while I decided whether or not to go for a slot-head with side roller tuners. Despite the slight sonic advantage I decided in the end that Peghed tuners looked more ‘authentic’ as otherwise it would start to resemble a mini guitar. The neck blank was cut and the sound hole cut out of the top.
At this stage the rosette was also cut in so that the assemblage of the box can begin. Early days but all shaping up very nicely.

Late April: The sides have been cut and steamed into shape ready to start the assembly of the box. Clearly bending the sides of a uke isn’t such a big job as with a guitar but it’s the same process. JK has a pretty unique neck build process.
He joins together two neck blanks each with different grain directions, sandwiching a carbon fibre rod in between for good measure. The combination means that the neck timbers counterbalance each other and lessens the risk of the neck warping. the carbon fibre rod adds additional rigidity

The box is being assembled – and it’s finally starting to look like something that will be capable of making a musical sound.
While there is a jig involved it’s still tricky to ensure perfect alignment. As with everything on the build of a fretted instrument precision at this point – or lack of it – can’t really be fixed down the track. As we’re going to be using a traditional dovetail joint to fix the neck to the body this is a critical piece, especially the fitting of the neck and end blocks. The picture is with the various clamps removed to give a clearer view of the jig and the sides in place.
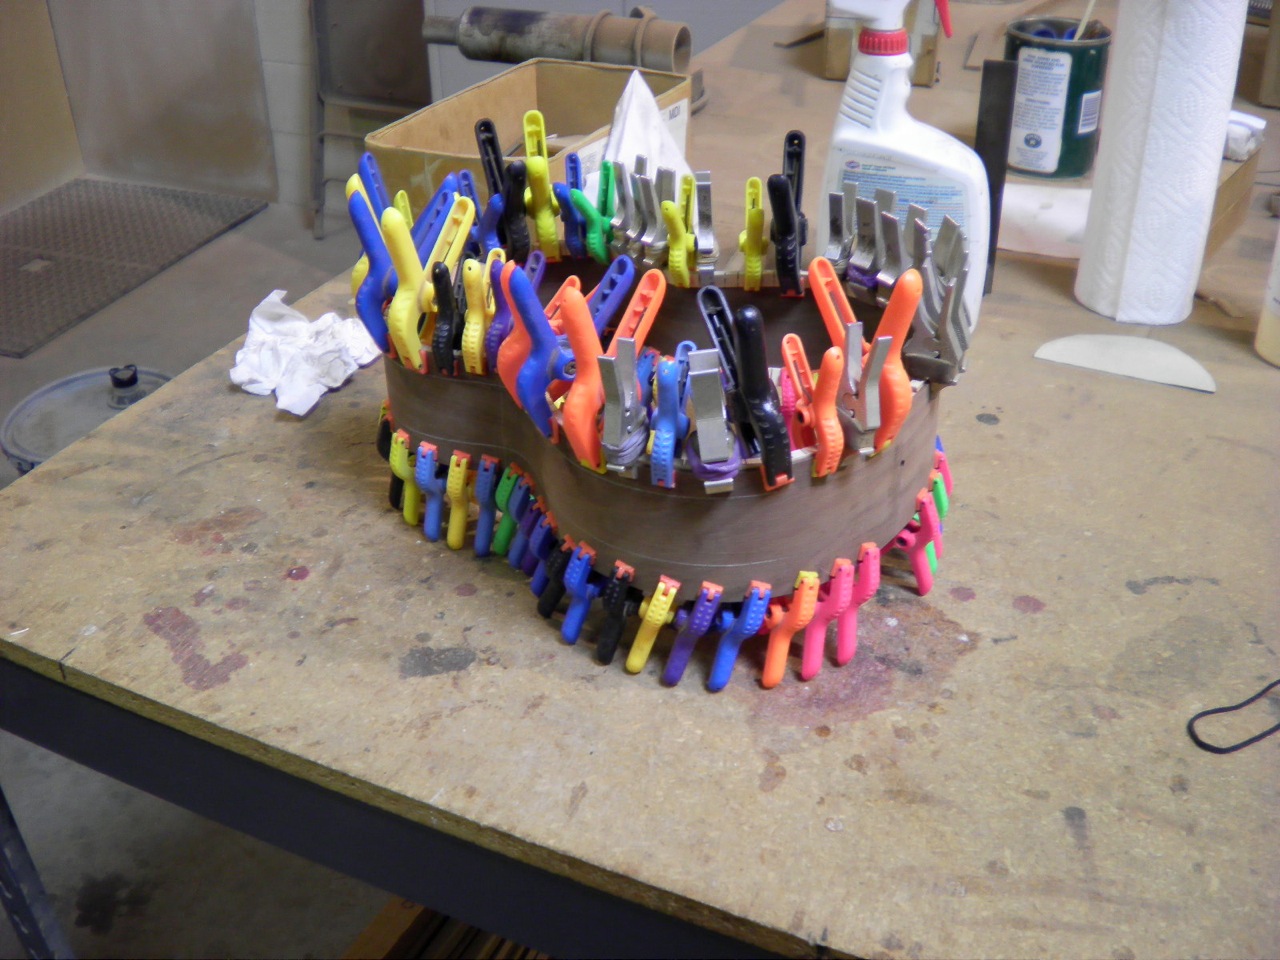
After a few days being dried and set the sides are finally ready to be prepared to accept the front and back. This involves gluing on the kerfed lining that will provide a larger surface area to glue the top (soundboard) and back to. It also means that when the edges of the soundbox are rebated to take the decorative purfling that there will still be enough surface area for the two edges to grab on to.

Because we’re using old-fashioned adhesive the peg clamps are left in place overnight to ensure a firm bond.
While all this was happening the braces were applied to the back and top. They are scalloped in place to allow the sound board and back to vibrate more freely. We’re using a version of fan-bracing given the size of the top.
We’re now in a position to put the soundbox together. It’s obviously a critical point of no return… once it’s glued then that’s it, all locked up.
It went together really well and after drying we’re ready to start applying the purfling and binding around the edges. I spent a fair bit of time looking at purfling designs. Interesting (well I think so!) that the first record of an instrument with decorative purfling is an Amati violin from the 1530’s. Violins from this time also had binding, but always in the same timber as the actual body, so you don’t actually notice it.
We’ve decided on a very simple three strip White/Black/White purfling detail. The two white strips butt onto the dark walnut of the top and back and then the walnut outside binding.
While the purfling is purely decorative the binding does have a practical purpose of protecting the end-grain timbers on the top and back from hydroscopic ingress of moisture. Probably less of a need now that the majority of instruments have a nitro-cellulose lacquer, but nice to know it isn’t just for show.
 We have also added a mitred purfling detail to the sides of the soundbox – it’s very light but because it’s not on the soundboard it doesn’t affect the way the top vibrates. The purfling on the top is very narrow, so doesn’t step too far into the top, affecting the sound very little, if at all.

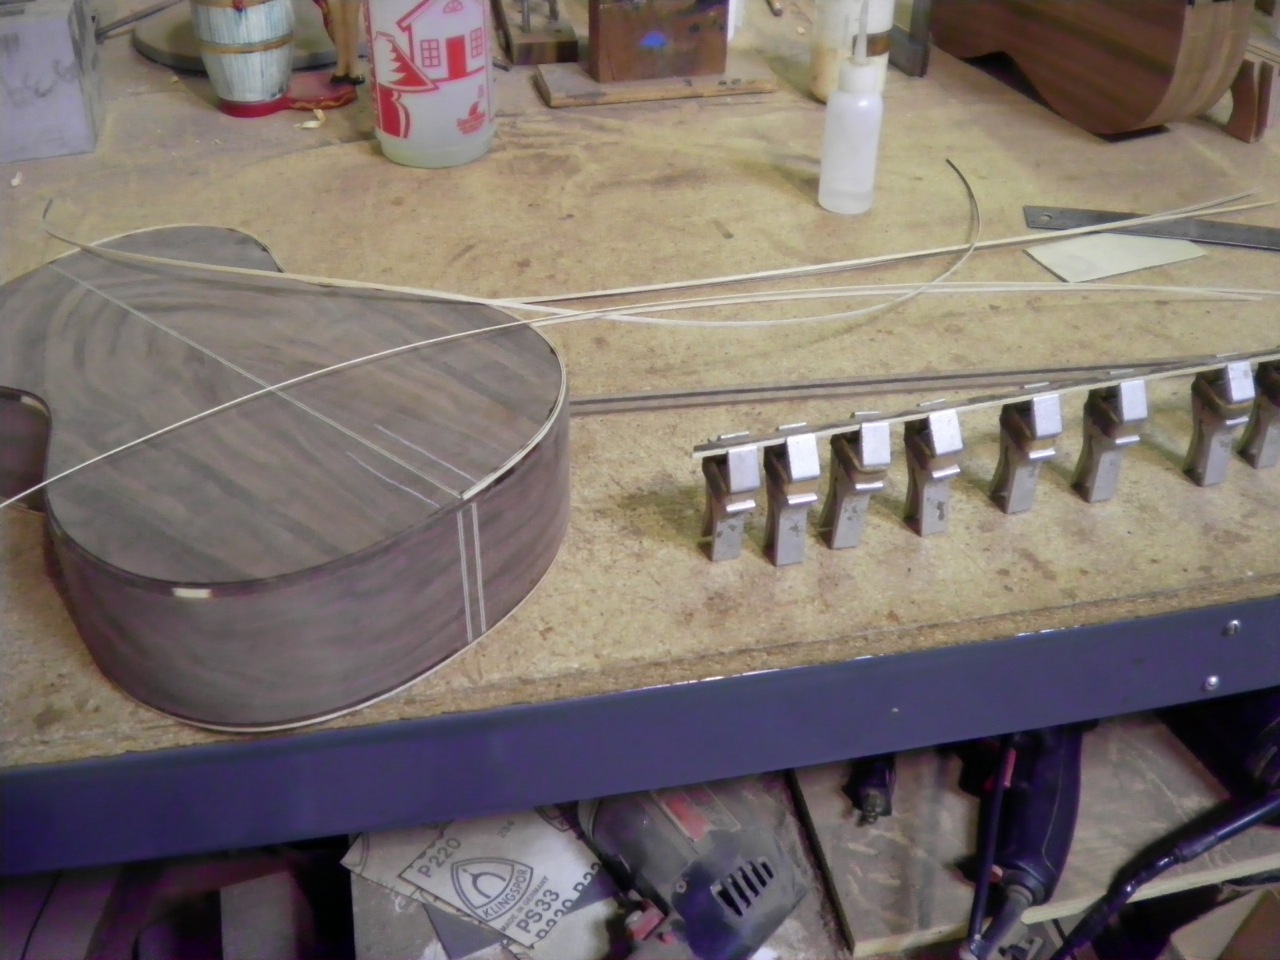
Early May: after about 5 days of on/off work the purfling and binding is complete, making a finished soundbox.
It hasn’t been an easy task with a couple of the purfling strips splitting along the way but it looks terrific, especially the mitred purfling and binding.
I was concerned that overly ornate purfling can look out of scale – Danny Ferrington has made a few mini guitars with Style 45 neck inlay and body detailing and it just looks out-of-scale. Fortunately by making the purfling for the instrument from scratch, rather than buying it ready made from a luthiers supplier like Mercantile, it looks totally in keeping with such a relatively small instrument.
 Along the way the dovetail for the neck was cut by hand using only a basic jig. We are going to see if we can get some hide glue, as was used by guitar makers in the 1800’s up until the 1930’s. Martin have started using it again as an option on their heritage instruments… but it may be just too messy to try on just one instrument. But the body is looking great.
May 15: John started back on the neck today. Two channels will be routed to take
 the two rectangular carbon fiber “rods” 1/8″ thick by 3/8″ tall inserted into the neck and ultimately glued in before adding the fingerboard. These give the neck stability in two ways. First, the string pull upwards and any uneven pull due to the difference in string tension between the treble side and base side. A tenor ukulele has only about 39 lbs of pull on the string tension but imagine holding 40 pounds of sugar out at the end of your out stretched arm!
July: We’ve had a bit of a break due to a backlog of work in the spray shop – so the Tenor has had to sit at the back of a queue.
The good news is that when the re-finishing has been completed – the end of this week – the uke can tag onto the end of the queue and have its first coat of paste fill varnish.

This is what the body looks like with its paste fill coat. The neck isn’t added at this point so a sacrificial piece sits in place so that the join of the neck and fingerboard don’t get any varnish on them. Even with this basic paste fill the colour and figuring is coming through – the walnut is more like koa than I imagined it would.
The neck has also had its filler coat so after a rub down the neck can be joined to the body ready to go into the spray shop for the final 4+ coats of nitro-cellulose lacquer.
 August: the sanding down of the varnish filler is complete and the neck has been offered up on a temporary fit.
The two routs are ready to accept the carbon fibre rods after which the ebony finger-board is added to the neck. We’ve decided to add an ebony head-stock faceplate so that the neck looks one complete piece. Because the uke has no decoration on the neck or headstock it looks functional but very clean in look and line. Exactly what we talked about way back when the build was being planned in February!
The plan is for the uke to go into the spray shop next week…
 August 15th: well the uke has had four thin coats of lacquer and 3 rub downs in-between. I wasn’t around for the spray shop so I’ve just got the photo’s of the tenor at the end of the process.
It’s come out slightly darker than i imagined and has moved strongly into walnut rather than koa colour – but that’s as it should be.
So later this week we get to put the whole thing together – which is so exciting that I can hardly wait. At this point it will feel like a kit of parts but having sat through the whole process I know it started out as a few pieces of raw timber that have been lovingly shaped and crafted into a living instrument.
August 20th: Completion day! A new Ukulele is born and it sounds as sweet as I hoped. The final stages of construction were very straightforward – the neck setting needed a little work as I wanted the action at fret 12 a little lower than usual; the bridge fitting was painless and the pegheds fitted a treat. We strung her with Worth Tenor Ukulele strings and christened her with a rendition of ‘Here Comes The Sun’ – in memory and to honour that champion of the uke – George Harrison.
The final touch is putting the nameplate on the case – I’ve gone for a Stagg tweed case which looks nice and matches my other Soprano Uke case. We managed to find one with a plush red lining which looks pretty cool. I’m pretty sure they’re made in China and probably get landed at the port for less that a fiver – but they do a pretty good job.

She plays a treat and I’m pleased that we went with a Low G version. She’s going on the road in a couple of weeks. First around California to show it off and play with Ronnie and Vince. Then on to Greece and Turkey where I’m going sailing. I know the skipper is not a uke fan so I’ll be playing quietly in the forepeak cabin.
